I blog about...

Showing posts with label lunch. Show all posts

Tuesday, February 12, 2013

A Lovely Tuesday...

God is so incredible! This morning I woke up to my husband asking if he could hold me for a few minuets. We usually can't fall asleep cuddling, and lately we haven't been sleeping at the same times at all, so this was a really nice surprise, and it spoke my love language quite a lot!

Needless to say I got out of bed feeling very loved and grateful for a day off of school where I was healthy! 


Breakfast was Quinoa Oatmeal with Mango and Cinnamon:


Ingredients: 1/2 cup quinoa, 1/2 cup steel cut oats,1 cup boiling water, 1/4 cup cubed mango, a dash of cinnamon, a drizzle of honey, and a splash of almond milk (optional to add on at the end)                            
To make:
1. Bring water with quinoa already added to a boil for about 10 minuets (cover halfway with a lid)
2. Meanwhile cut up mango and mix with oats, cinnamon, and honey
3. When water is (almost!) gone, pour quinoa and boiling water (about 1/4 a cup) into the same bowl
4. Mix together and enjoy with some coffee! 


I took the bus to Starbucks for a date with my student's papers... They are very smart, but also very funny sometimes.... I choose to laugh instead of get frustrated with their antics; it's just easier that way :-) 


I also had a great egg, feta, and spinach wrap there for lunch! Which was very tasty and just what I needed to keep me warm with my hot mint tea. Then I began the 2 hour journey to go grocery shopping via CTA bus route, which was quite the adventure! I managed to get all of what I wanted to get, plus 2 honey greek yogurts, tomato soup, bananas, and 6 pink lady apples, all in my draw-string backpack and oversized bag. And I managed to get from the Beverly Starbucks to the Pullman Aldi, then to the West Pullman bus stop, all the way back to Roseland, and walk the three blocks to my house with only being asked for my number 3 times-- huge success!
When I got home, I had gotten a packaged from my mom with a pretty hot-pink mullet sweater (it's a thing, I swear...) a jury commission questionnaire (uh-oh!), and some throat-coat tea. What a nice surprise! 

After putting groceries away and warming up my numb feet (from the cold walk), I went ahead and got going with my Tuesday workout. I did these 3 videos, and even though the last one is only 10 minuets, it was defiantly the one that made me sweat the most...


So, God has really been wonderful! I'm about to shower off and get going on some whole wheat pizza dough for date night with my incredible husband tonight! I'll post that recipe for homemade pizza later... Have a blessed day!

Sunday, February 10, 2013

Steam is Clean

Lately it's been smelling like a sauna in my kitchen...


Weird right? It's actually not that weird. It's because I've been using my new Bamboo Steamer for cooking lately, and when this wooden basket heats up with steam, it really does kind of smell like those Bamboo saunas filled with hot air and steam.... minus the sweaty people of course.

Quite honestly, I don't know how I got along without one of these amazing things! They cook both veggies and meat so well, and it doesn't take constant stirring or checking on to make lunch. I can literally toss in my carrots and broccoli, go fold laundry or take a shower for 15 minutes, come back, and lunch is ready!

It's also very healthy for you too. Much healthier than microwaves, sauteing vegetables in oil, or even boiling vegetables in water.

Studies show that microwaving vegetables destroys a high percentage of its nutritional value, as does boiling vegetables in water. The nutrients just drain out of them! You might as well drink that water to get them back...

And of course, adding oil to vegetables adds unnecessary fat, which isn't always a bad thing. But if you're looking for a super-healthy way to get your veggies in, steaming is definitely the way to go!

Here's a great recipe I just had yesterday, and it was easy as pie to make!

Steamed Veggies with Chicken and Quinoa-Rice 


Ingredients:
1/2 cup red quinoa 
1/2 cup brown rice
5 cups water
1 thawed chicken breast
2 cups of chopped vegetables (I used baby carrots, broccoli, red pepper, mushrooms, spinach, and lentil sprouts)
Some seasonings of your choice


Steps to Make:
1. Heat 2 cups of water in a small sauce pan 
2. Pour in quinoa and rice into the water and bring to a boil
3. Reduce heat, and cover with a lid
4. Meanwhile, chop up veggies into large pieces (the larger pieces will allow the vegetables to maintain their nutrients) 
5. Heat another larger sauce pan with 3 cups of water and bring to a boil
6. Place the steamer on top of the boiling pot (if you don't have a steamer, you can use a colander with a lid over it)
7. Place the chicken on the steamer first, followed by the larger veggies, then the smaller ones (if your steamer has two layers, you can put the chicken on the bottom layer and the veggies on the top layer)
8. Allow to steam for 15 minutes, turning the chicken over halfway through
9. Sprinkle chicken and veggies with seasoning
10. Spoon rice and quinoa mixture into a bowl
11. Cut chicken into strips and mix into the same bowl
12. Top with steamed veggies
13. Enjoy!


Monday, January 21, 2013

Daniel Fast Recipe #10: Quinoa Mushroom-Stuffed Pita Pockets

Here's another mushroom recipe for Brandy! 
This is also a "Claire Creation" (aka my own recipe)
Special shout-out to Datrice for giving me some quinoa! 
Our dinner was splendid because of her generous donation to our kitchen. 

And now, without further ado...

Quinoa Mushroom-Stuffed Pita Pockets


Here is what you will need for the Pita Bread:
2 cups of whole wheat flour
2 tablespoons of olive oil
1-2 cups of water (add more if dough looks too flour-y)

To make the Pita Bread:
1. Mix ingredients together until dough forms
2. Kneed into a ball, then place in a bowl and cover with a damp cloth
3. Set aside in the fridge for 1 hour
4. Once ready, preheat oven to 350
5. Take out the dough and divide into 4 round balls
6. Roll out into flat circles about 1/3 an inch thick (the thickness does matter here)
7. Place pita bread onto a lightly sprayed backing sheet
8. Put into the oven and make for 10-15 minuets (check on them often.... you may see them start to pillow up; that's a good thing though! It makes it easier to stuff the pita)

Here is what you will need for the Filling:
1/2 cup quinoa (red or white)
1/2 cup drained black beans
2 handfuls of spinach
1/4 of a large green pepper
1/2 of an onion
1 cup of mushrooms
Balsamic Vinegar 
Garlic powder, black pepper, salt 

To make the Filling:
1. Bring 1 cup of water to a boil, add quinoa, reduce heat and simmer until water has boiled out
2. In a pan, heat a few tablespoons of balsamic vinegar
3. Chop onions, mushrooms, and green pepper, then add to the heated pan
4. Throw in a few handfuls of spinach and allow to saute for about 7 minuets
5. Add black beans and quinoa to the pan as well
6. Season to taste, stirring for another 5 minuets

Putting it all together:
1. Once the pita bread is done, take them out the oven and allow to cool for a few minuets
2. Cut each pita in half with a pizza cutter or a knife (if the bread it pillowed up, then you don't have to do much more than that in order to stuff it!)
3. Take a small knife and cut into the pita to create a small pocket inside (you may spoon some of the extra bread out if there is a lot inside)
4. Stuff the filling into the pita pocket with a spoon
5. Arrange on a plate and enjoy!


So how were they, you ask?

Well, Dennis and I enjoyed them quite a lot! Dennis even took one to the studio with him to eat later tonight.

The only thing I would have changed about what I did was to take the pita bread out sooner. I left it in there for a bit too long and they got really hard and dry. They would have been much softer and easier to stuff if I had taken them out sooner. That's why I wrote in the directions to watch them closely! I also would have rolled them into thicker pieces; some of mine were too thin, which is why I specify to roll them into 1/3inch thick pieces. If you want to play it safe, do 1/2 inch!

I will definitely be making this again! The quinoa and black beans makes this meal really high in protein, and I also liked the taste of the balsamic vinegar in the filling. I may start sauteing more food with this rather than with oil!

Let me know if you have any more requests! We're almost done with the Daniel Fast, so stay strong and lean upon the Lord!


Sunday, January 20, 2013

Daniel Fast Recipe #9: Brandy's Mushroom Salad

This one is for Brandy, due to the fact that she loves mushrooms 
and requested some mushroom recipes!

Cabbage and Chickpea Salad with Grilled Portobello Mushrooms


Ingredients:
3-4 portobello mushrooms
pinch of chilli flakes
1 garlic clove
1-2 tablespoons extra-virgin olive oil
1/4 small red cabbage
1/4 small green cabbage
2 green shallots or onions
1 cup cooked chickpeas
1/2 cup walnuts
3-4 tablespoons extra-virgin olive oil
1 tablespoon apple cider vinegar or regular vinegar
1 teaspoon mustard powder (optional)


To Make:
1. Preheat the oven to 350
2. Clean the mushrooms and remove the stalks. 
3. Whisk together one or two tablespoons of olive oil with one grated clove of garlic and a pinch of chilli flakes, then brush the mushrooms with the mixture and bake for 10-15 minutes
4. Finely slice the cabbages and shallots and place in a large bowl 
5. Lightly toast the walnuts by spreading them on a dry pan and placing in the oven for 5-10 minutes, then add into the salad. 
6. Add in the chickpeas and toss to mix. 
8. Whisk together the apple cider vinegar, olive oil, and mustard powder (or some more chili flakes if you want!) for a dressing, and then drizzle on the salad
9. Cut the mushrooms in thick slices and arrange on top of the salad
10. Enjoy!


Saturday, January 19, 2013

Daniel Fast Recipe # 8: Vegetable Sushi

It's been a few days... I swear I've been cooking things and eating food, but I just haven't had a lot of time to blog about it. Report Cards come out soon.... so I've been up to my eyeballs in late work from kids who finally decide they want to pass my class. But hey! It's all good.

Here is a recipe for homemade Sushi:

You will need...

2 cups brown rice
1 cucumber
1 avocado
3 green onions
1 large carrot 
1 tomato
1/2 green pepper
1 bag of Nori (seaweed wraps which can be found a Jewel in the Asian food section)
soy sauce (optional)
lemon juice (optional)
cumin and garlic (optional)
wasabi (optional)
A bowl of warm water and a washcloth or napkin
A long sharp knife without serrated edges
A cutting board to serve as a sushi-rolling surface
A Sushi roller (optional)

To prepare ingredients:

1. Bring 2 cups of water in a pot to boil, add brown rice, reduce heat, and cover with a lid until water has evaporated
2. While heat is still on the pot, add a splash or soy sauce and a splash of lemon juice along with a few dashes of cumin and garlic. Stir rice until mixed thoroughly  (again, this is optional, but it makes the rice more flavorful)
3. Allow rice to cool while preparing the vegetables
4. Peel the cucumber, then cut into long slices so they look like quarter-inch sticks
5. Do the same wit the carrot
6. Slice the tomato into quarter-inch slices, then take out the seeds and cut the circles in half so that the tomato edges can be stretched into stick-like pieces
7. Cut off the roots and very ends of the green onions so they are also long pieces
8. Slice the green pepper into long stick-like pieces
9. Slice avocado into quarter-inch pieces after taking the pit and outer peeling out
10. Set the veggies aside into little bowls or in separate sections on a large plate, fill a bowl with warm water and dip a washcloth or napkin in. Set the knife nearby, then bring out a cutting board as a working surface.

Okay, now that you have all the ingredients prepared, you can get ready to make the sushi rolls:

1. Take out a sheet of Nori and place with the shiny side down onto the cutting board
2. Gently spoon some rice onto the Nori and very carefully spread so that there is a think layer of rice over most of the surface, but leave a strip at the very bottom and the very top free of rice
4. Place your favorite combination of veggies in a strip at the very bottom of the Nori, right where the rice starts. There should be a strip of Nori at the bottom that can be folded over the veggies, so put the vegetables on top of the rice.
5. Wet fingers and dab water onto the rice-free Nori at the bottom and top.
6. Fold the rice-free Nori strip over the veggies, then gently roll the entire sushi roll until you get to the top of the Nori, where the rice stops.
7. Wet fingers again, and smooth the rice-free Nori flap so that it sticks to the rest of the roll.
8. Roll gently over so secure the sushi roll, and keep the wet side down
9. Take the wet washcloth and wet the sharp knife
10. Cut the sushi roll in the middle by gently sawing the roll, not by pressing down. This will help the roll stay intact and help it maintain it's curricular shape.
11. Clean and wet the knife with the wet cloth before each cut.
12. Cut the two sushi roll parts in half again with the same sawing movement
13. Clean and wet the knife again
14. Cut the four sushi roll parts in half, then gently set each piece aside on a large serving plate
15. Repeat steps 1-14 until the rice is gone, or you have enough sushi for your family


Some of my favorite combinations of veggies:
Onion, Avocado, Cucumber
Tomato, Onion, Carrot
Avocado, Pepper, Cucumber
Carrot, Avocado, Pepper, Tomato, Onion

You can get really creative with the veggies if you want, adding mushrooms, spinach, tofu, or cabbage (as you can maybe see, I added some spinach to one roll and some tofu as well). After the Fast, you can add cream cheese, crab meat, spicy tuna, or shrimp!

Things to serve Sushi with:
Miso Soup (you can buy packets of this at Jewel)
Stir Fried veggies in soy sauce
Soba or rice noodles in vegetable broth with spinach, mushrooms, and green onions
Tofu, pan fired in peanut butter and soy sauce

Ways to eat Sushi:
With chop sticks
With fingers
With a boring old fork.... if you must ;-)
Dipped in Soy Sauce
Dipped Soy Sauce mixed with wasabi
Slice a piece of ginger on top of it
Just eat plain!

Monday, January 14, 2013

Daniel Fast Recipe #7: Black Bean Burgers on Whole Wheat Flatbread with Spicy Potato Wedges

Welcome to my "Recipe of the Week"!

Today's creation was a combination of fun things I have now learned to do and I am so glad that I have these very simple skills. With these cooking elements, I can pretty much create endless combinations of classic "crowd pleasers". (Well, at least for a Daniel-Fasting crowd...)

I call them "crowd pleasers" because they allow one to make a 'burger-n-fries' meal, and who doesn't just love a burger and some fries... even if they are Vegan? 

The elements to a "burger-n-fries/crowd-pleaser" meal are below:

1. Know how to make a burger. A Veggie burger, to be exact, and it must be out of items you already have in your possession.

2. Understand the process of cutting potatoes into wedges and seasoning them properly.

3. Become an expert at making flatbread from flour, water, salt, oil, and fire.

4. The art of plate arrangement... 'nuff said.

With these 4 skills, you can whip up a meal out of raw materials and impress all of your fasting/vegan/vegetarian/weird friends.

"Enough Claire, just give us the recipe!"


Alright, alright. I just thought you needed to know...Anyway, the Recipe is entitled: 

Black Bean Burgers on Whole Wheat Flatbread Buns
with Spicy Potato Wedges


(Note to self: become more simplistic with naming your meals...)

(Note to Readers: This recipe serves 8...ish)


Black Bean Burger Ingredients:
1 onion, chopped
1 can of black beans (or 2 cups of soaked and cooked black beans
- if you get them dried in the bag)
1/2 cup brown rice
1/2 zucchini, chopped


To make burgers:

1. Bring 1 cup water to a boil, then place rice in, reduce heat, cover and allow to simmer
2. Cook rice until water is all gone, but don't burn the rice!
3. Drain rice and set aside
4. Chop the onion and zucchini, then heat over medium heat with a small amount of oil or cooking spray
5. When onion begins browning, add the black beans and cook for 5-7 minutes
6. Remove from heat and place 2/3 or the mixture in a blender
7. Blend for a few seconds, then place this back into the pan with the other mixture
8. Add the rice and mix thoroughly, set aside and allow to cool for 10 minuets
(here's where I started making the flatbread and wedges)
9. Divide into 8 portions and shape into patties
10. Heat a little oil in a pan, and when hot, place 2 burgers on for about 5 minutes on each side, then place on a plate to cool
11. Remove from the pan, then repeat with the other burgers until they are all cooked
12. Store any leftovers in the fridge until they're needed, but eat them within a week!

Flatbread Ingredients:
4 cups whole wheat flour
2 teaspoons of salt
About a cup of water 
(just enough to make it into dough)
1 teaspoon oil

To make flatbread:
1. Mix flour and salt in a large bowl 
2. Form a small hole in the middle of the mixture and pour the water into the hole
3. Mix until slick dough forms
4. Kneed dough and divide into 16 round balls (or however many people will eat a burger, multiplied by 2)
5. Sprinkle with more flour, then roll each ball out into round circles about the size of a burger
6. Heat a skillet over high heat and spray generously with cooking spray or rub with a small amount of oil
7. Plot the first circle of dough down and allow to cook for 2 minutes, flip and allow to cook for 1 minuet
8. Remove from heat and set aside on a plate to cool
9. Do this with the others until all the buns are on the plate cooling 

Spicy Potato Wedges Ingredients:
6 large red potatoes
Cumin, crushed red pepper, garlic powder, 
black pepper, salt, italian seasoning
cooking spray

To make potato wedges:
Preheat oven to 400
Wash the potatoes
Cut into halves the long way
Slice the halves into wedges (you can decide the preferred thickness)
Sprinkle seasoning in a large bowl and dump the uncooked potato wedges into it
Mix the wedges by shaking the bowl or stirring with a wooden spoon
Spray the potatoes with some cooking spray so the seasoning will stick, but they won't stick to the pan
Place potatoes on a nonstick, lightly sprayed pan
Place in the oven for 35-45 minutes, stirring and flipping often (you may take the out early if you want tender fries, or leave them in a bit longer if you want crispy fries)

Putting it together...


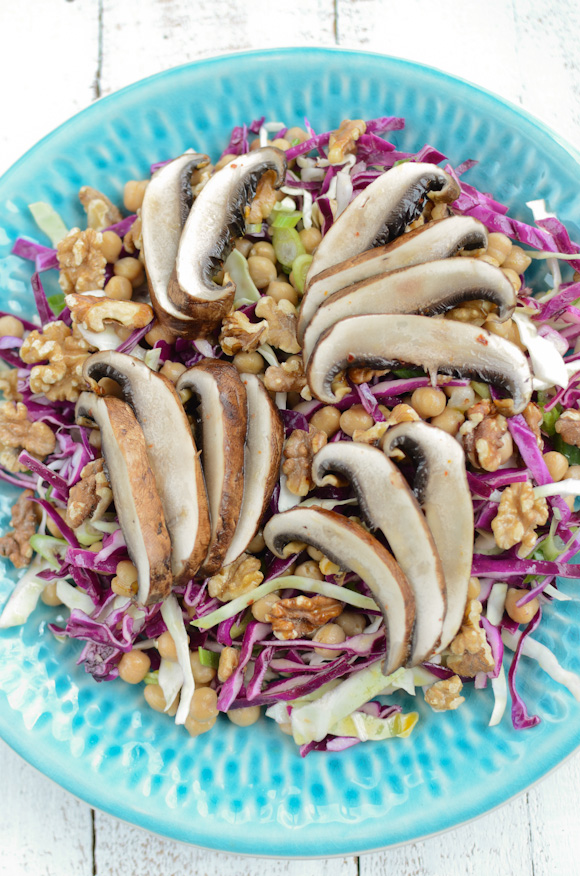
Once you have the potatoes cooking and the flatbread and burgers just about done, you can slice up some toppings for your burgers! I topped ours with some tomato and a little spinach with some oil and vinegar. You can also add mushrooms, tomato sauce, pickles, or hummus, but before you put any other condiments, check the ingredients label for any artificial, chemical, or sugar additives (high fructose corn syrup is no good!). We dipped the fries in tomato sauce (it's like ketchup except without the additives)!


This was a big win for dinner tonight! The only tips I can offer are that the burgers will be a little delicate. They don't have much to hold them together, so be careful when flipping them and when eating. They may crumble a little, but that's okay! 

Also, we only made 4 flatbreads, since there are only 2 of us. But we did each end up eating another burger without a bun, so while it serves 8, some may want to eat more than just 1 burger, in which case, it may only serve 4 or so. 

The wedges were really good! I put a lot of seasoning on them, but that made them all the more tasty! We only cut up 2 small red potatoes for the fries (again, since there are only 2 of us). You can alter the recipe based upon how much you think you and your family will eat, or how much you want for leftovers! 

This meal is really high in protein and fiber. It also gets in a heaping serving of veggies and is low fat! All in all, a tasty, vegan, healthy, yet hearty meal with "meat" and potatoes! 

See, I told you it was a crowd-pleaser :-)

Sunday, January 13, 2013

Daniel Fast Recipe #6: Veggie Pot Pies

This is a variation of a recipe I found in Vegetarian Times Magazine. It's a good resource as well, so I provided the link!


Dennis got super excited when I told him I was making him a pot pie for lunch, so I am equally super excited about sharing the recipe with you!

Here's my version of the recipe that serves 2:

Dough Ingredients:
1/2 cup whole wheat flour
1 tiny pinch of salt
2 tablespoons of olive oil
1/4 cup water (or just enough to make the dough slick)

To make Dough: 
1. Whisk together flour and salt in bowl.  
2. Stir in cold water until smooth dough forms. Add olive oil and kneed. 
3. Wrap in a plastic bag or in plastic wrap, and chill while making Filling.
Filling Ingredients:
3/4 cup vegetable broth
1/4 cup frozen corn
1/4 cup frozen peas
1/4 cup chopped broccoli 
1/8 cup chopped onion
1/8 cup chopped carrot
1/8 cup chopped celery 
2 sliced mushrooms
1 small red potato, diced
1 tablespoon of all-purpose flour
garlic powder, cumin, salt, pepper, Italian seasoning to taste


To make Filling:
1. Heat oil in large pot over medium heat. Add broccoli, celery, carrots, onions, and mushrooms; sauté 5 to 7 minutes, or until tender. 
2. Stir in flour and cook 1 minute. 
3. Add potato, broth, and seasoning. 
4. Cover, and bring to a boil. Reduce heat to medium-low, and simmer 10 minutes. 
5. Remove from heat, and stir in peas, and corn.

Putting it all together:
1. Preheat oven to 400°F. 
2. Divide dough in half, then roll out to 1/8-inch thickness.
4. Divide Filling among 2 ramekins or oven-safe bowls. 
5. Place dough rounds on top, pressing dough around sides of bowls or ramekins with fork to crimp and seal. 
6. Cut a few slits in the top of each pot pie. Brush the tops of the crust with a small amount of olive oil. 
7. Place pot pies on baking sheet, and bake 30 to 40 minutes, or until tops are golden brown. 
8. Let stand 5 minutes before serving.


So How Where They?

We really liked these a lot! The only thing we might have enjoyed more was if there was a creamier filling. Many recipes call for a "cream of..." soup for the filling, but since that is a "no-no" in the Daniel Fast, we used the veggie broth and the flour. 

The crust was pretty good too, which I was surprised about! I thought that I would miss the butter that usually is in these types of crusts. 

This is a healthy and pretty tasty lunch option, but who has time for that during the middle of the day? The magazine suggests freezing these one-serving pot pies to save for later, so if you wanted to, you could make a bunch at one time, then save them for later during the week. 

Many frozen pot pies which you can conveniently buy at grocery stores are very high in fat, preservatives, and sodium. They also usually contain chemicals that I can't even pronounce, which usually is not a good sign of a healthy meal option. This is a wholesome, delicious, and fairly easy alternative to your typical pot pie!

I hope you enjoy!

Wednesday, January 9, 2013

Daniel Fast Recipe #5: Spring Rolls with Peanut-Soy Dipping Sauce

Another "Claire Creation" for you this evening!

Spring Roll Ingredients:
1 package of Banh Trang spring roll skin or rice paper (I found a few brands at Jewl)
1/2 a bag of mixed salad with lettuce, cabbage, and carrots 
2 small tomatoes, diced
1/2 cucumber cut into small sticks
3 slices of onion, diced
1/4 avocado, cubed
Cinnamon, salt, and pepper
2 tablespoons of lemon juice


Spring Rolls:
1. Preheat oven to 350
2. Chop up vegetables and places over medium heat
3. Add mixed salad, lemon juice, and a dash of salt, pepper, and cinnamon (weird, I know, but it's great!)
4. Allow veggie mix to sauté until lettuce and cabbage is wilted
5. Take out the rice paper package
6. Dip one paper in a bowl of luke-warm water and gently pat dry with a paper towel
7. Spoon the hot veggie mixture so that the veggies are in a long rectangular shape
8. Fold one long side of the rice paper over the veggies, then fold the two shorter sides in
9. Roll the mixture over so that the flap of the rice paper is facing down
10. Lay on a lightly oiled non-stick baking sheet
11. Repeat steps 6-10 with the other spring rolls until all the veggie mixture is gone (I made 6 rolls)
12. Lightly brush the tops of the roll with olive oil
13. Place in the over and bake for 10-12 minutes
14. When rolls come out, allow to cool for a while. No one likes burning their fingers on a hot spring roll!


Peanut-Soy Dipping Sauce Ingredients:
1/2 cup soy sauce
1/4 cup chunky peanut butter (you may use smooth just as easily)
2 tablespoons of sesame seeds or flax seeds


Sauce:
1. Heat soy sauce in a small sauce pan over medium heat
2. Add peanut butter and sesame or flax seeds and whisk together
3. Once the sauce is mixed and the peanut butter has melted, turn off heat
4. Pour into a bowl and allow to cool before serving


Ours turned out pretty well! The rice paper may be the ingredient that you have trouble finding. I found a lot of other brands that included eggs... But if you search "rice paper recipes" you might be able to find out how to make your own. I was not that adventurous on a Wednesday...

Anyway, I've been posting a lot of Mexican dishes, so I thought an Asian twist might be fun tonight.

Enjoy!